Getting The Right Look With Fog And Haze
All haze isn't created equal
Different fog machines and hazers produce dramatically different qualities on camera.
When the Director or DP calls for fog or haze, there is a very specific look they want to achieve in the shot.
How do you get the look they want?
Hint: It’s a mistake to think it’s “only about the lighting.”
We created the guide below to help clarify the DPs desired look and then select the best machine to meet those needs.
We produced tests shots using 10 machines under controlled conditions (methodology described below).
The results were staggering!
The machine you choose really does have a massive effect on the final look of the shot.
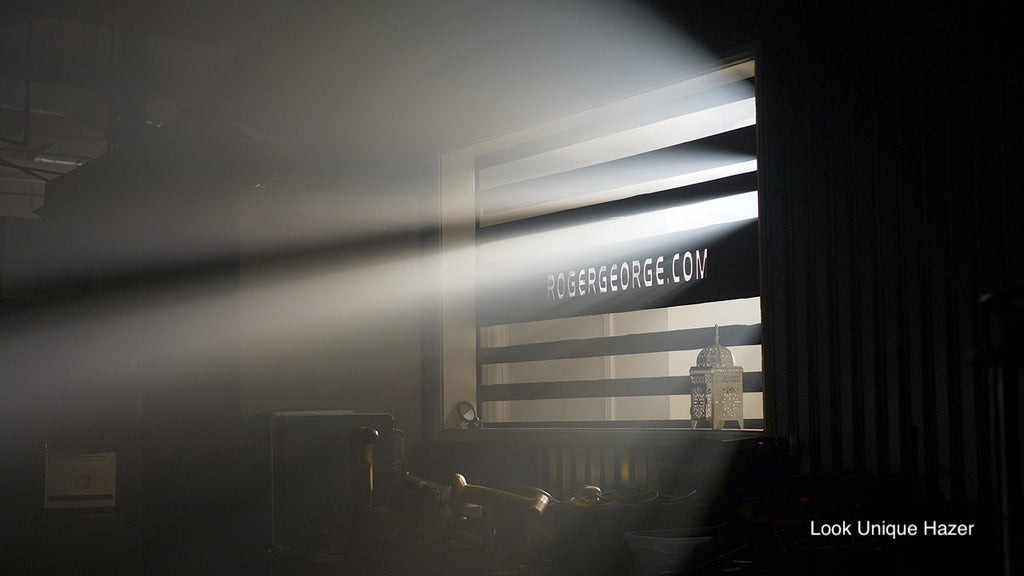
Fill time for 109,000 cubic feet: 5 min, Warm up time: 30 sec., Noise Level: Low
» Unique Hazer Product PageLook Unique 2.1 Haze Machine
With a high level of diffusion and a slight shift towards orange, the Unique hazer produces a very pleasing look. It’s the perfect machine for overall diffusion while adding a hint of warmth to the scene. We like it for general atmosphere, period pieces, and any scene that needs a softer touch.
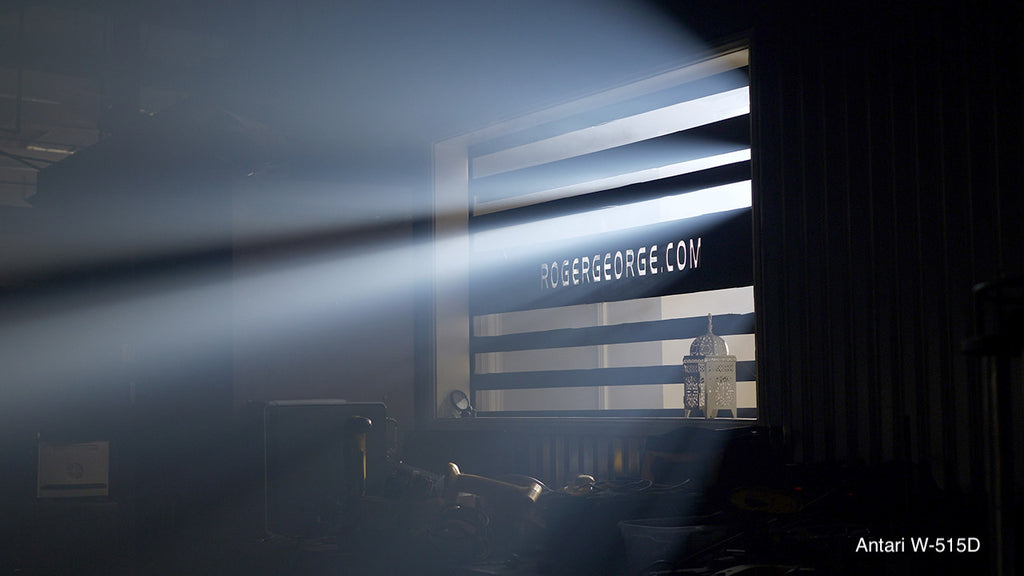
Fill time for 109,000 cubic feet: 8 min, Warm up time: 10 min., Noise Level: High
» W-515D Product PageAntari W-515D Fog Machine
We tested the W-515D using the manufacturers FLG fluid which produced a very distinct electric blue color cast. You can see in the wave form the strong pull towards blue and cyan. The haze also created great shafts of light. The output of the W-515D diffused light less than some of the other machines so the shadow areas stayed darker and accentuated the sharp light shafts. We like this look for SiFi, Horror, and for specialty lighting like laser shows.
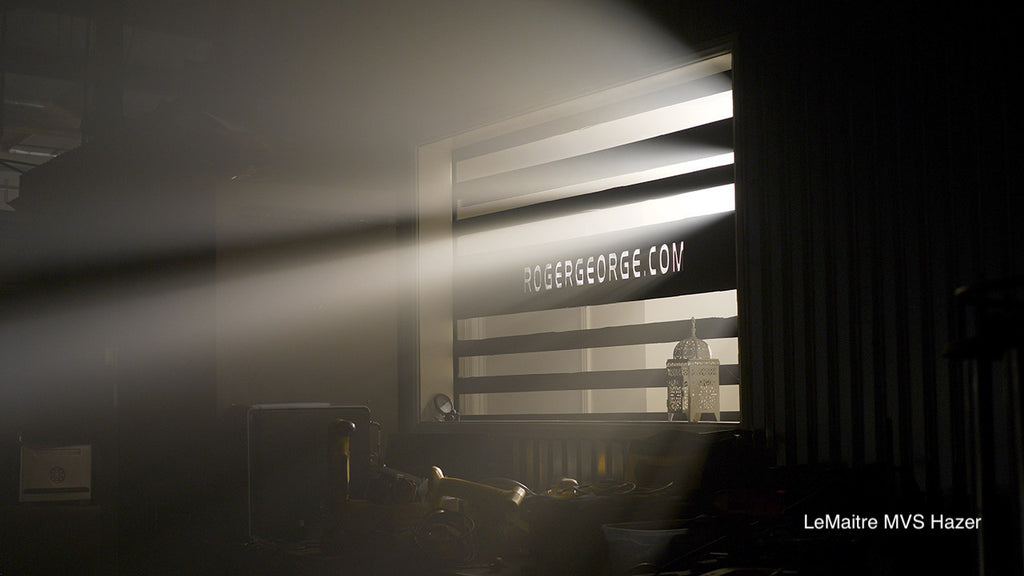
Fill time for 109,000 cubic feet: 17 min, Warm up time: 2.5 min., Noise Level: Low
» Le Maitre MVS Product PageLeMaitre MVS Hazer
If you are looking to add a warm nostalgic glow to your seen the MVS will deliver—its haze produced a nice soft difusion. The quality makes the MVS great for general atmosphere with a slight warm tone. The MVS also features a sweep mode to distribute and even haze. If you are looking for a similar look on a lower budget check out the EcoHazer.
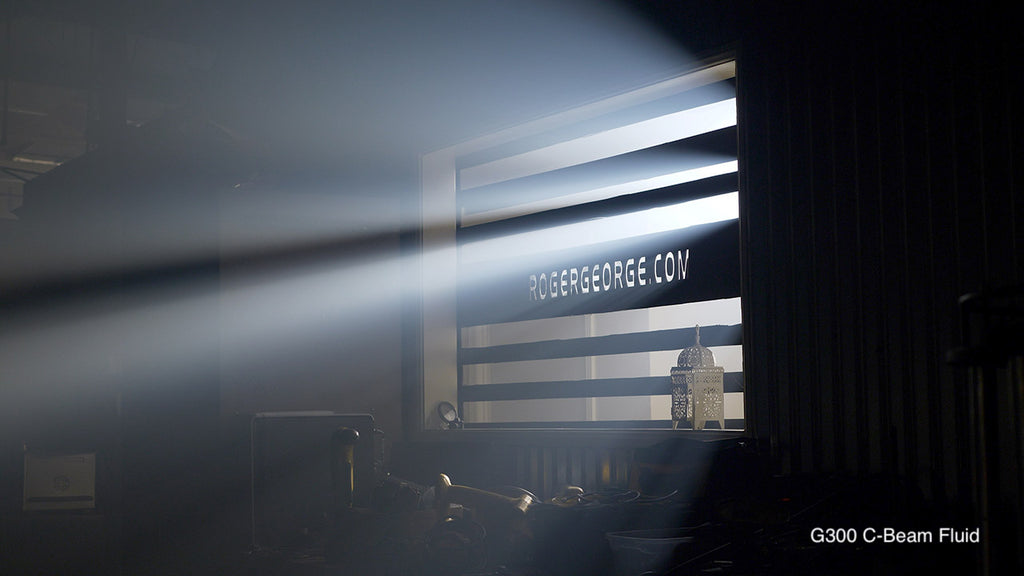
Fill time for 109000 cubic feet: 5 min, Warm up time: 4.5 min., Noise Level: Moderate to High
» G300 Product PageLeMaitre G300 With C-Beam Haze Fluid
If you are looking for sharp shafts of light this combination is hard to beat. The fluid and machine created a slight shift to blue, but it’s not as dramatic as the Antari machines. This combination of the G300 and C-Beam fluid creates a nice high contrast haze.
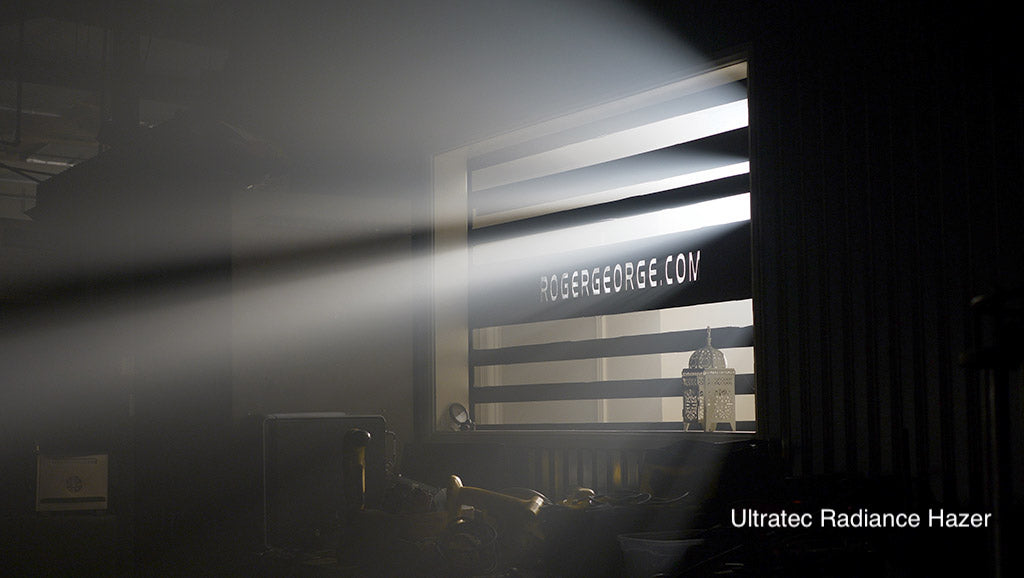
Fill time for 109,000 cubic feet: 10 min, Warm up time: 6.5 min., Noise Level: Low
» Ultratec Radiance Product PageUltratec Radiance Haze Machine
The Ultratec Radiance machine produces a haze with a nice contrast balance that has a slight push towards blue and cyan. The Radiance is a good choice for all around atmosphere whether your aim is to accentuate light beams or to add depth.
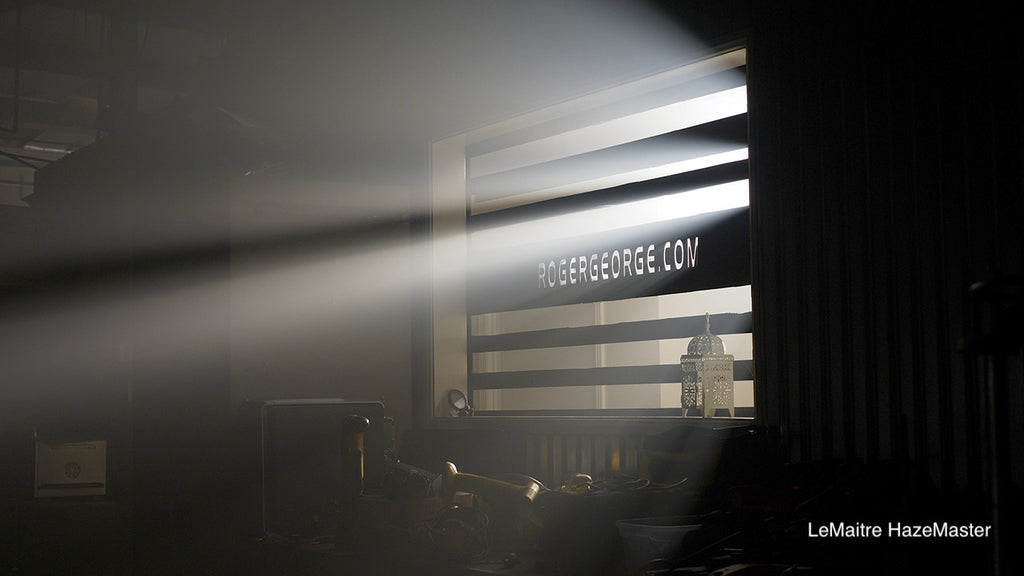
Fill time for 109,000 cubic feet: 3 min, Warm up time: 4 min., Noise Level: Moderate
» HazeMaster Product PageLeMaitre HazeMaster
This machine is a beast! If you need to fill a large room with haze quickly this is the best option. We were able to fill up our 109,000 cubic feet machine room in just over 3 minutes. And we were able to double the density in just 7 min. If you need to quickly fill a stage or a large arena, think HazeMaster. The HazeMaster produces a nice soft diffusion with a neutral color and a very slight shift towards blue. It creates a great all around atmospheric look. It’s great for creating depth with a nice color balance.
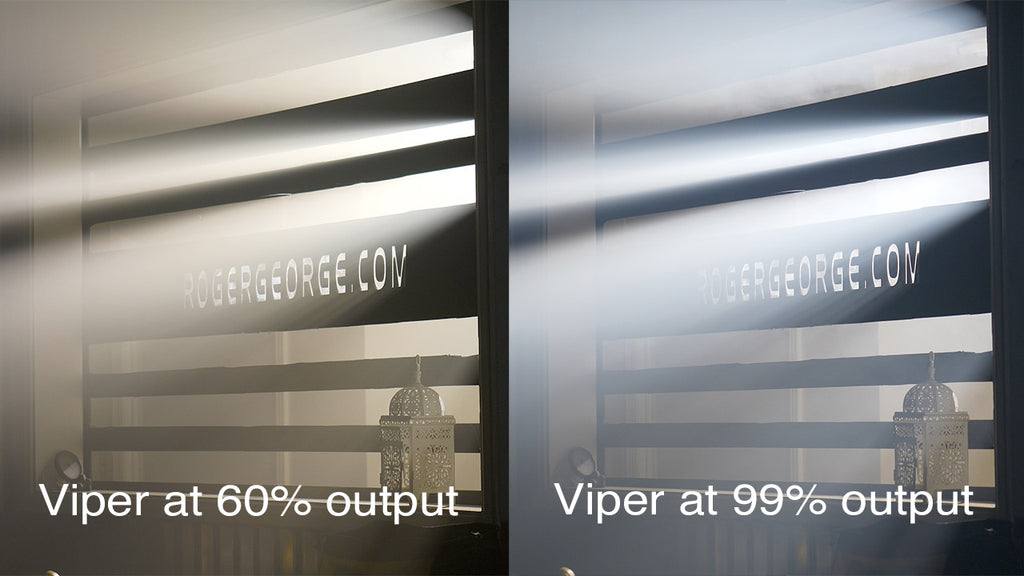
Fill time for 109,000 cubic feet: 4.3 min, Warm up time: 11 min., Noise Level: Moderate to High
» Viper NT Product PageLook Solutions Viper NT Fog Machine
Two looks, one machine. We discovered that we could shift the color cast of the haze by adjusting the output level. If you want a warmer tone, run the machine a 60%. If you want a cool blue look, run the Viper at full blast. We were so surprised by the color shift, we ran the test twice. We got the same result. See for yourself in the image!
How we tested the fog and haze machines
We wanted to put each machine on as even a footing as possible. We did 3 things to achieve this.
Establish Consistent Fog Density
We filled our 109,000 cubic foot machine shop with the same density of haze from each machine. To achieve consistency, we set up a 1kW tungsten fresnel at one side of the shop and pointed it at gray card set to a 45° angle. We then placed a spot meter on a tripod aimed at the gray card to get consistent readings. Then we pumped in haze until the light level went down just over 1 stop.
Throughout filming we monitored haze density to make sure it was within a few tenths of a stop.
We also kept the shooting time very short. The order in which the images were shot was identical. We did this to minimize the impact of any dissipation.
Light Quality
We used only halogen tungsten lights without any gels or other modifications. Halogen tungsten lights produce a high quality and very consistent light. No changes were made to the lighting setup.
Camera Setup
Each shot used the exact same White Balance, ISO, aperture, shutter speed, and lens. We did this to make sure that the camera settings did not effect the look of the image.
Sound Level
We sampled sound levels using the Decibel X Pro software running on an iPad Pro, then categorized them as low, medium, high.
We'd love to here what your experiences have been! Leave them in the comments bellow!

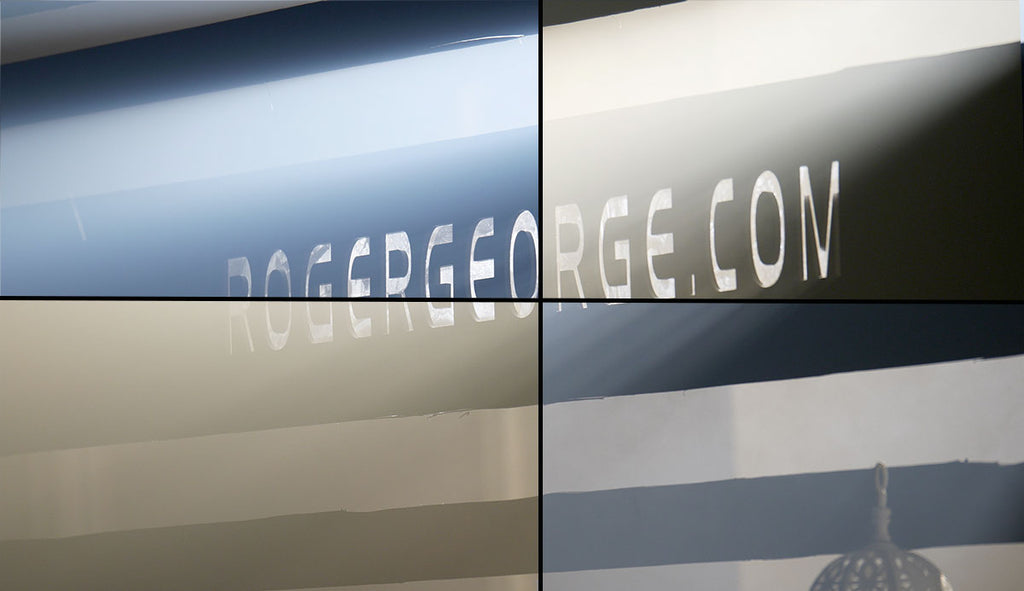
Viper NT giving a color shift seems to indicate that aerosol particle size might be what influences color the most. Its still hard to believe the color shift was THAT dramatic – and maybe the light warmed up due to more smoke in the path on the way through the window ? Its really weird to see that big of a difference. Great test, thanks for sharing !
It would be great to know which fluids were used in all machines, to see if the various blends of glycols also had a big influence on the color.
Leave a comment